Flexible vs Rigid Solar on a Curved Roof.
On most campers this is a genuine choice with arguments on both sides. On a teardrop the roof shapes it, because the roof is curved and rigid panels are not. Rigid panels go on a rack above the curve; flexible panels go straight onto it. Neither is simply better, and it's worth being clear-eyed about what each gives up. Here's how the two compare, and how we mounted ours on a roof we'd spent weeks making watertight: 3M VHB bonding tape to hold it, and screws where the wind pulls.
Rack or Roof
A rigid panel is a sheet of glass in an aluminum frame. It needs a flat plane to sit on, and it can't bend to meet the roof. A teardrop roof gives you none of that — it's curved along its length, sometimes tightly at the ends, and there's rarely a flat run long enough to matter.
A rack solves that, and plenty of builders want one anyway. It holds rigid panels level above the curve with air moving underneath, and it earns its place beyond solar: a cargo box, recovery gear, a kayak, or a rooftop tent that sleeps two more. The usual mount is four brackets, two down each side, each fastened through the side wall with two or three bolts — eight to twelve holes, drilled and sealed once. It changes the teardrop's profile and adds some height and weight. We only needed the roof for power and wanted to keep the original roofline, so on our build flexible panels bonded to the curve with 3M VHB bonding tape were the right fit.
What Flexible Costs You
Be clear about the trade. Flexible panels are not simply a more convenient rigid panel — they're worse in several specific ways, and none of them are dealbreakers on a teardrop.
Shorter Life
A glass rigid panel will likely outlast the trailer. A flexible one is a plastic laminate exposed to UV and flexing, and it doesn't get the same warranty for good reason.
It Runs Hot
Bonded flat to the roof, there's no real air gap underneath — just the thickness of the tape. Panels lose output as they heat, so a flat-mounted panel on a July afternoon produces less than its rating suggests.
No Tilt
A rigid panel on brackets can be angled at the sun. A flexible one takes whatever angle the roof gives it, which in winter is a real loss.
Harder to Replace
VHB tape doesn't unbolt. Taking a panel off means backing out the screws, sawing through the tape with fishing line, and cleaning the residue off the roof — an afternoon, not unbolting it from a rack.
Efficiency per Square Foot
Generally a little lower than a comparable rigid panel, which matters because roof area on a teardrop is the one thing you can't buy more of.
What You Get Back
No rack to build, a row of screws along each leading edge instead of bracket bolts through the walls, almost no added weight or height, and the teardrop's original roofline.
Mounting It Without Ruining the Roof
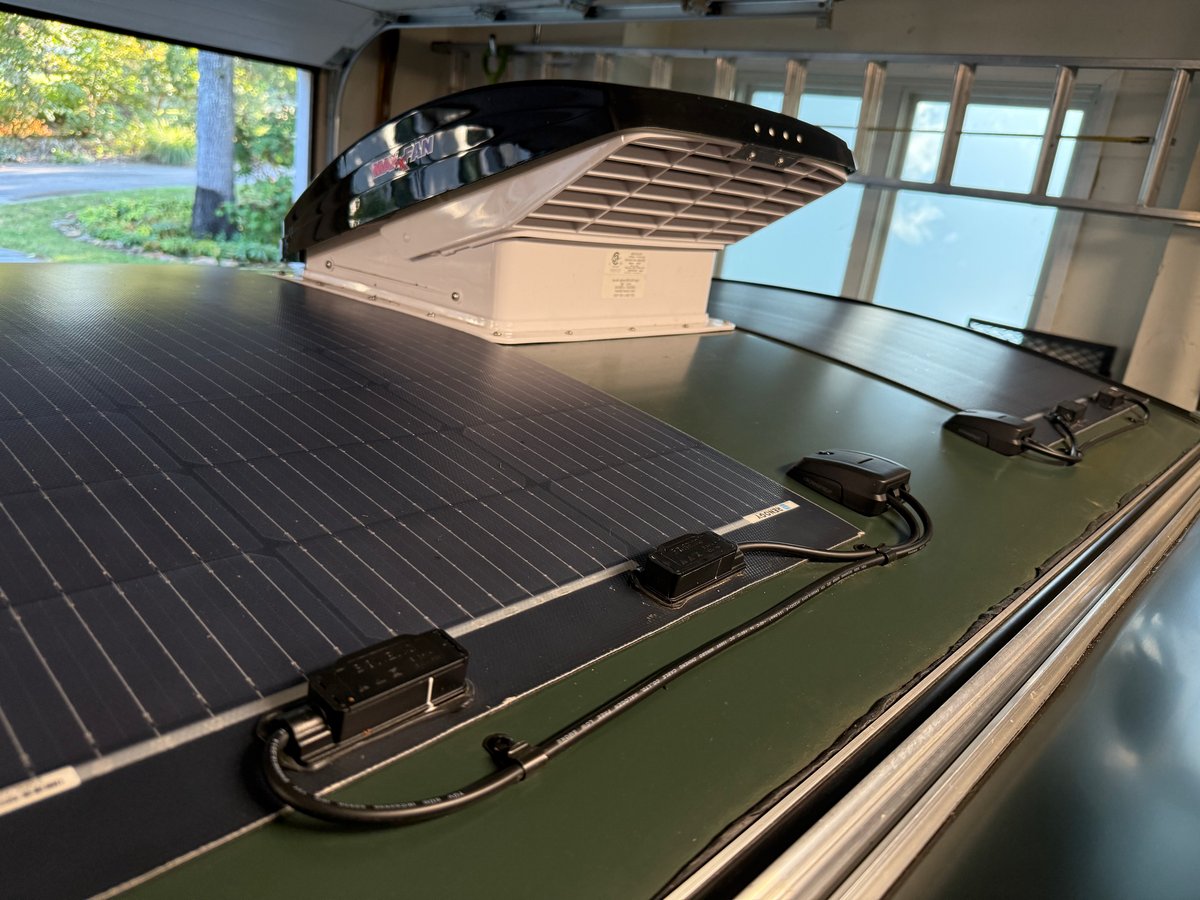
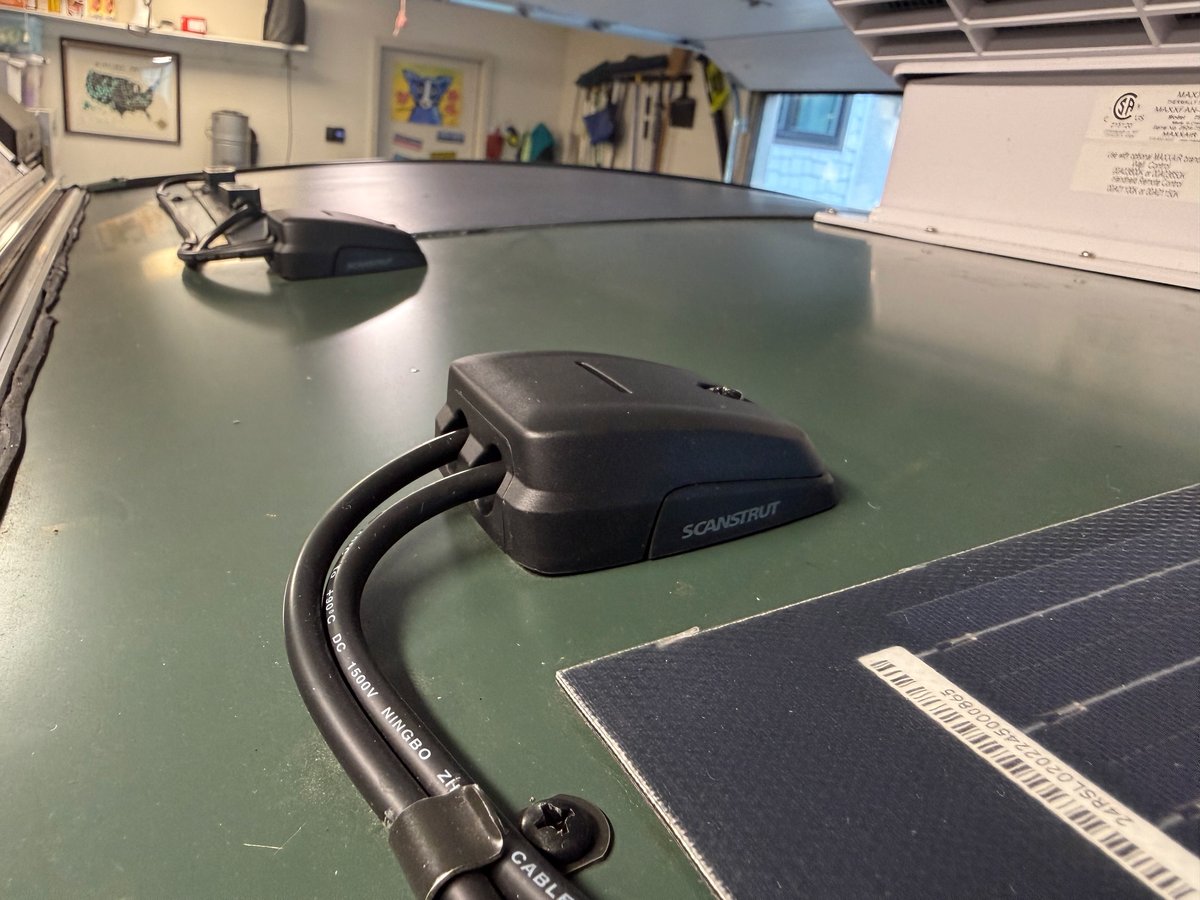
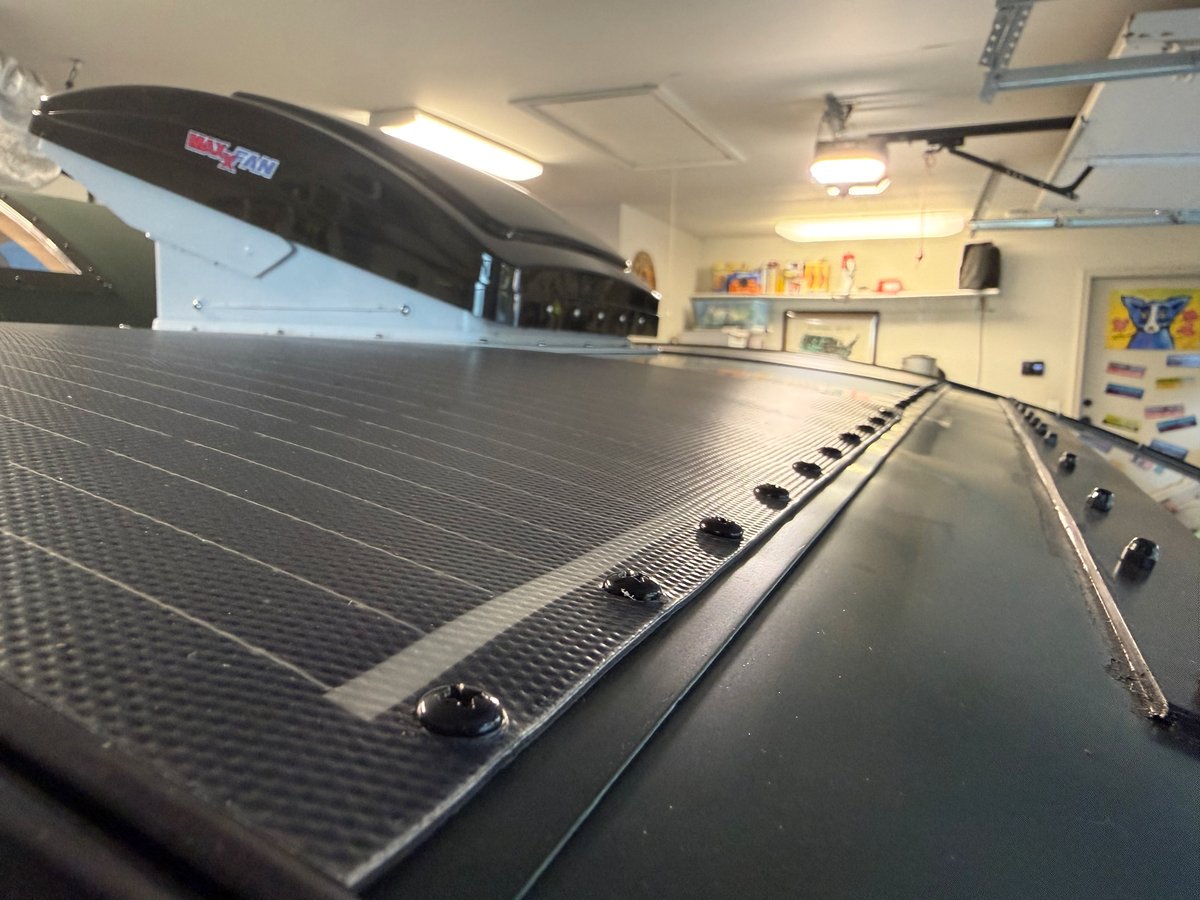
The roof is the part of the build you least want to get wrong. We bonded each panel to the aluminum roof skin with 3M VHB bonding tape, then ran #8 stainless steel button-head screws along the leading edge. The VHB holds the panel down. The screws are there because a bonding tape is far stronger in shear than in peel, and a panel's front edge at highway speed is a peel load: the wind gets under the lip and starts lifting.
Clean, Then Clean Again
A VHB bond fails on contamination more than anything else. 3M's prep for VHB is a wipe with isopropyl alcohol and water on both surfaces, not a pass with a shop rag.
Pressure Makes the Bond
VHB bonds by contact, and contact comes from pressure. Roll the panel down firmly over every strip of tape; a hand pressed flat doesn't do it. It gains strength for days afterward, so don't tow on it the same afternoon.
Mind the Temperature
3M puts the ideal application range at 70–100°F and advises against applying below 50°F. A cold garage in November is the wrong day to do this.
Screw the Leading Edge
#8 stainless button-head screws through the front edge of each panel, where the wind hits first. Each one passes through the layer of VHB tape underneath, and the tape seals around it. Stainless so they don't rust; button heads so there's nothing proud for air to catch. Sealant over the heads is cheap extra insurance if you want it.
One Gland Per Panel
Both of a panel's leads go through a single two-entry cable gland over one hole. Two panels means two glands, and each one is a joint you never want to redo.
Leave Room
Plan around the fan, the vents and anything else that lives up there before the panel goes down. Afterwards you have no options.
MPPT, Not PWM
Whatever panel you choose, the controller matters more on a curved roof than a flat one. A PWM controller effectively drags the panel down to battery voltage and wastes the difference. An MPPT controller converts it, which is worth real amp-hours — and it matters most in exactly the conditions a teardrop lives in: partial shade, low winter sun, a panel that's never quite at the right angle.
We run an MPPT 75/15. It isn't a large controller, and it's worth knowing how little headroom that leaves: the 75/15 takes 220W of panel at 12V, and two 100W panels put us at 200W. Right kind of controller, near the top of its range — a third panel would mean a bigger one.
Which Way to Go
On the Roof

Size It Properly
A panel only makes sense against the bank it's charging. Our wiring diagram builder sizes solar, battery and wire gauge together and prints the parts list.
Open the Wiring Diagram BuilderShop This Post
What’s on our roof, or the closest thing to it still sold.
Disclosure: KnoxDrops is a participant in the Amazon Services LLC Associates Program. As an Amazon Associate we earn from qualifying purchases — if you buy through a link on this page, it costs you nothing extra.
← Back to Blog